
| Prep | 20 minutes |
| Cook | 8 to 10 minutes per batch (about 30 minutes in all) |
| Total | 50 minutes |
| Makes | About 48 cookies |
| Equipment | Stand or hand mixer, 2 baking sheets, cooling rack |
If your peanut butter blossoms come out with slumped, shiny chocolate puddles instead of neat little kisses on top, the cookie is rarely the problem. It is the timing. Press the chocolate in while the cookie is still screaming hot and the kiss melts; wait too long and the cookie has set, so it cracks apart instead of hugging the chocolate.
This version is built around fixing exactly that. The dough is the classic one, peanut butter and shortening rolled in sugar, and the kisses go into the freezer while it bakes. A short rest on the sheet before pressing gives soft, crackled cookies with a kiss that keeps its point.

Ingredients
- 48 milk chocolate kisses, unwrapped – unwrap them first and freeze them while the dough comes together.
- ½ cup butter-flavored shortening – gives the classic tender, slightly sandy crumb and keeps the cookies from spreading.
- ½ cup creamy peanut butter – a regular, stabilized brand; natural peanut butter separates and makes the dough oily.
- ½ cup granulated sugar, plus about ¼ cup more for rolling
- ½ cup packed light brown sugar – for a softer, chewier center.
- 1 large egg
- 2 tablespoons milk – loosens the dough just enough to roll smooth balls.
- 1 teaspoon vanilla extract
- 1 ¾ cups all-purpose flour
- 1 teaspoon baking soda – gives the cookies their crackled tops.
- ½ teaspoon salt
How to Make Them
1. Freeze the kisses and heat the oven to 375°F (190°C)
Unwrap the chocolates, spread them on a plate and put them in the freezer. Heat the oven to 375°F and set out two ungreased baking sheets. The kisses should feel hard and cold by the time the first batch comes out.
2. Cream the fats and sugars – 2 to 3 minutes
Beat the shortening, peanut butter, granulated sugar and brown sugar until light and fluffy. Beat in the egg, milk and vanilla. Resist tasting the dough: Michigan State University Extension points out that raw cookie dough contains raw eggs and raw flour. The mixture should look pale and smooth, with no streaks of shortening.
3. Add the dry ingredients
Whisk the flour, baking soda and salt in a separate bowl, then add them to the mixer on low speed until just combined. The dough should be soft but hold its shape when you squeeze a piece.
4. Roll in sugar
Shape the dough into 1-inch balls and roll each one in granulated sugar. Place them about 2 inches apart on the sheets. Every ball should be fully coated and sparkling.
5. Bake – 8 to 10 minutes at 375°F
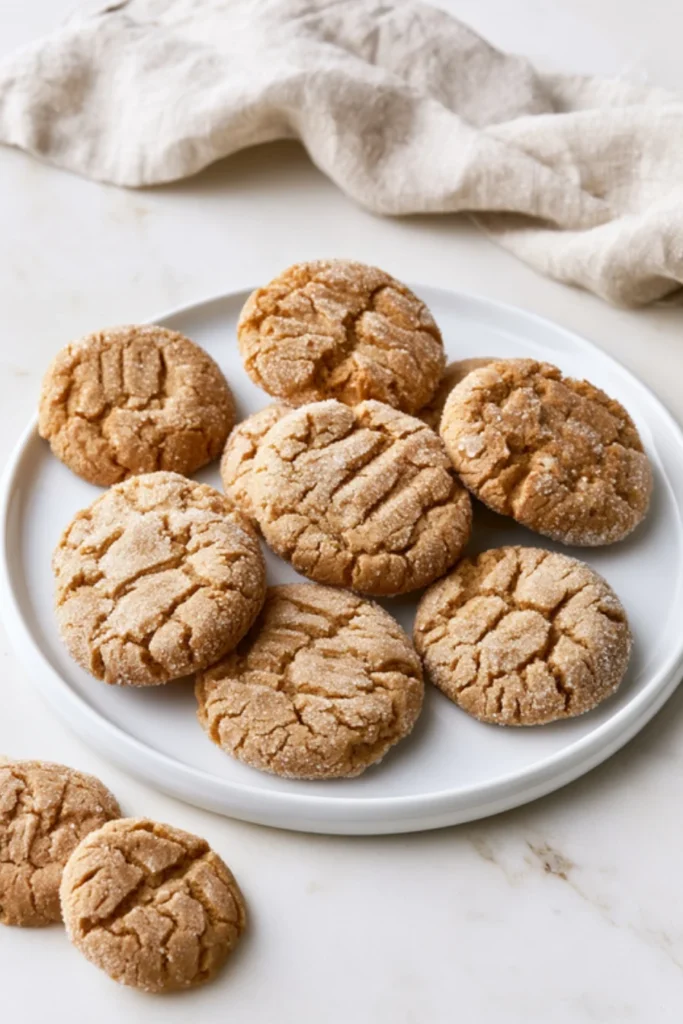
Bake one sheet at a time until the cookies are puffed and just turning golden at the edges. The tops should be crackled and the centers still look slightly soft.
6. Rest, then press in the kisses
Let the cookies sit on the sheet for 3 to 4 minutes, then press a frozen kiss firmly into the center of each one. Move them to a rack to cool completely. The edges should crack around the chocolate, and the kiss should stay pointed, not glossy.
Why Freeze the Kisses?
Milk chocolate starts to soften at a temperature far below the heat of a cookie fresh from the oven. A room-temperature kiss pressed into a hot cookie slumps within a minute. A frozen one has a head start: it takes longer to warm through, so the cookie has time to cool around it.
The short rest on the sheet does the other half of the job. Straight from the oven, the cookie is too hot and too soft; after 3 or 4 minutes, it is still pliable enough to crack around the chocolate but no longer hot enough to melt it.
Mistakes to Avoid
- Using natural peanut butter. The oil separates, and the cookies spread and turn greasy.
- Overbaking. These cookies firm up as they cool. Pull them when the centers still look soft, or they turn dry and crumbly.
- Pressing too late. Once the cookies have cooled, they crumble instead of cracking neatly around the kiss.
- Stacking too soon. Even frozen kisses soften a little. Let the chocolate set completely before you stack or pack the cookies.
Make Them Your Own
- Different chocolate: dark chocolate kisses, caramel-filled kisses or a mini peanut butter cup all work the same way.
- All butter: softened unsalted butter can replace the shortening. The cookies spread a little more and taste richer.
- Festive sugar: roll the dough balls in red and green sanding sugar for a holiday tray, next to a few pieces of cranberry pistachio bark.
- Peanut butter overload: if you love the flavor, serve them next to a no-bake chocolate peanut butter pie on the dessert table.
Storing and Making Ahead
Once the chocolate has fully set, keep the cookies in an airtight container at room temperature in a single layer or with parchment between layers. The dough can also be made ahead: shape and sugar the balls, chill them covered, and bake straight from the fridge, adding a minute if needed.
For a mixed holiday cookie box, they sit well alongside salted honey cinnamon cookies and Kentucky butter cake cookies, which bring a different texture to the tin.
Baking a Big Batch
One batch makes about four dozen cookies, which means four or five rounds through the oven if you bake one sheet at a time. A simple rhythm keeps the kisses on schedule and the cookies consistent.
Shape and sugar all the dough balls before the first sheet goes in, and keep the ones waiting their turn in the fridge on a plate. Cold dough spreads less, so the last batch looks like the first. Leave the kisses in the freezer and take out only a handful at a time, enough for the sheet that is about to come out of the oven.
Use two baking sheets and let each one cool before it goes back in the oven. Dough placed on a hot sheet starts to melt before it bakes, and the cookies come out flatter, with less of the crackled top that makes this cookie recognizable.
If you are baking for a cookie exchange, the dough doubles without any change in method. Only the timing grows: plan for about an hour of hands-on baking for a double batch.
Frequently Asked Questions
Why are my peanut butter blossoms flat?
Usually the dough was too warm or made with butter or natural peanut butter, which spread more. Shortening and a stabilized peanut butter keep the shape. Chilling the shaped balls for 15 minutes also helps.
Do you put the kiss on before or after baking?
After. Pressed in before baking, the chocolate melts completely in the oven. Bake the cookies, rest them for a few minutes, then press the kiss in.
Can I use the same rolling trick for other cookies?
Yes. A roll in sugar before baking gives the same crackled finish to many drop cookies, including cinnamon roll cookies.
Why did my cookies crumble when I pressed the kiss in?
They had cooled too long. Press the kisses in while the cookies are still warm and soft, a few minutes after they come out of the oven.
Can I make them without shortening?
Yes, with softened butter. The cookies will spread slightly more and have a crisper edge, but the method stays the same.
Can I freeze peanut butter blossoms?
Yes. Freeze them in a single layer until firm, then pack them in an airtight container with parchment between layers. Let them thaw at room temperature, still covered, so condensation forms on the container rather than on the chocolate.
How many kisses do I need?
One per cookie, so about 48 for a batch. Buy a few extra: some always break while unwrapping, and a pressed kiss that cracks is better replaced than used.
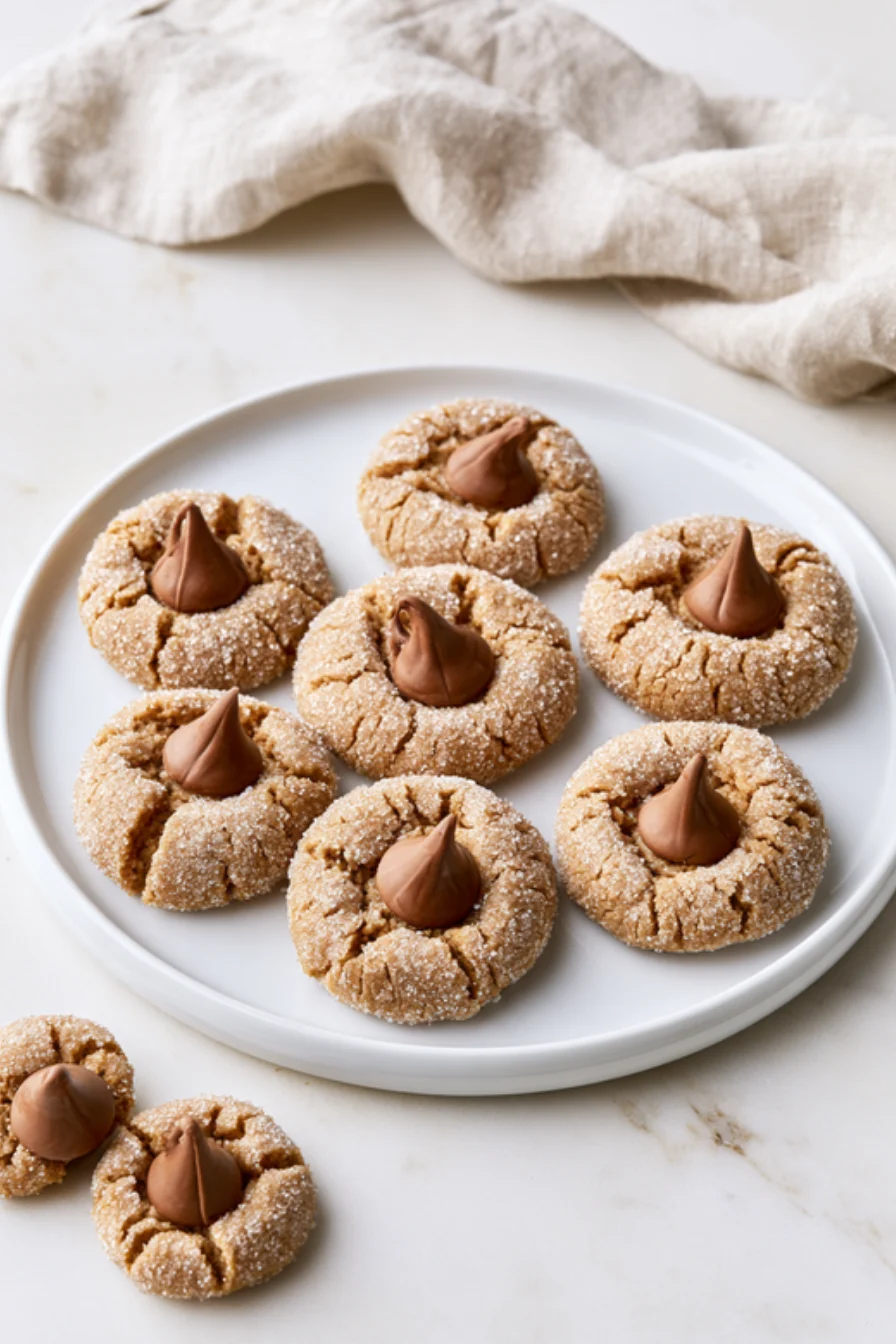
Peanut Butter Blossoms
Ingredients
Method
- Unwrap the chocolate kisses and freeze them. Heat the oven to 375°F (190°C).
- Beat the shortening, peanut butter, granulated sugar and brown sugar until light and fluffy. Beat in the egg, milk and vanilla.
- Whisk the flour, baking soda and salt, then mix into the dough on low speed until just combined.
- Shape into 1-inch balls, roll in granulated sugar and place 2 inches apart on ungreased baking sheets.
- Bake one sheet at a time for 8 to 10 minutes, until puffed and just golden at the edges.
- Let the cookies rest on the sheet for 3 to 4 minutes, then press a frozen kiss into the center of each. Cool completely on a rack.
Notes


Leave a Reply