
| Prep | 45 minutes |
| Cook | 30 minutes on the stove, then 50 to 55 minutes in the oven at 425°F and 375°F |
| Total | about 7 hours, including 1 hour to cool the filling and 4 hours to cool the pie |
| Serves | 8 slices |
| Equipment | 9-inch glass pie plate, wide heavy skillet or Dutch oven, rimmed baking sheet, rolling pin, pastry cutter or food processor, instant-read thermometer (optional) |
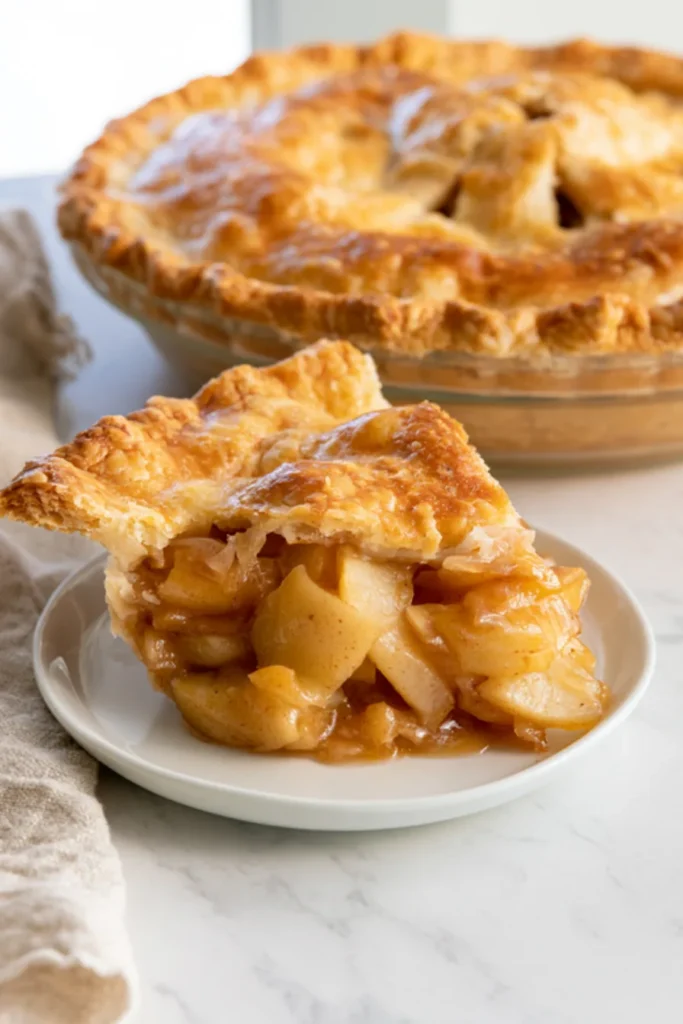
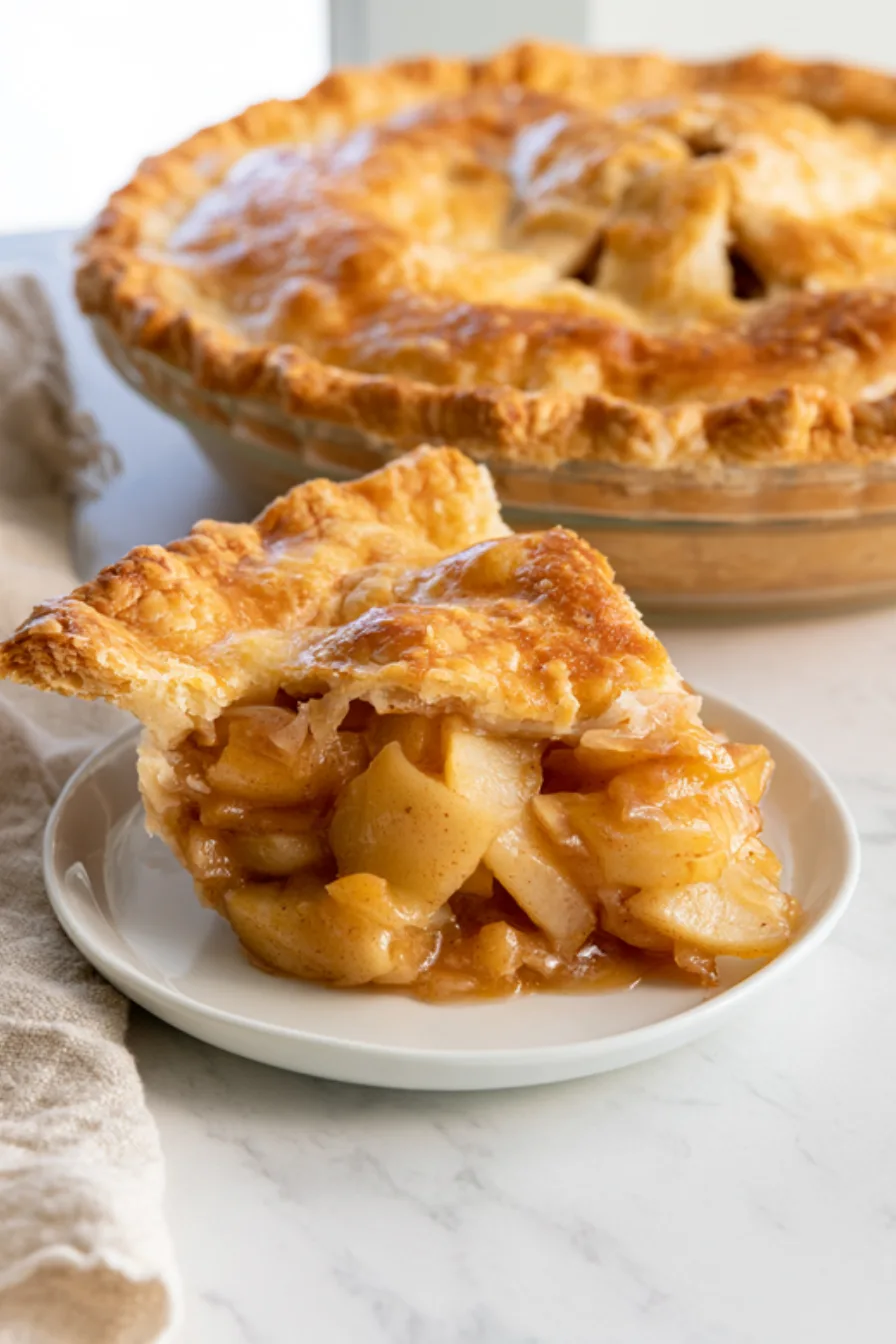
Cut into this pie and the slice comes out clean: a tall wedge of tender apple slices packed right up against a flaky, golden top crust, held together by a glossy filling that stays put on the plate instead of running across it. No hollow dome of pastry floating over shrunken fruit, no puddle of thin juice, no pale and soggy bottom.
Three things get you there. The apples are cooked gently on the stove before they go into the crust, so they shrink in the pan rather than under the pastry. The filling is thickened and cooled before assembly, so the bottom crust meets a cool, set filling instead of a flood of juice. And the pie bakes low in a hot oven on a preheated baking sheet, which sends heat straight into the bottom crust. The method takes longer than tossing raw apples into a shell, but most of that time is waiting, and the result is the apple pie people imagine when they hear the name.
Ingredients
For the all-butter crust
- 2 1/2 cups (300 g) all-purpose flour – enough for a bottom and a top crust.
- 1 tbsp granulated sugar – helps the crust brown; it does not make it taste sweet.
- 1 tsp salt – keeps the pastry from tasting flat.
- 1 cup (226 g) cold unsalted butter, cut into 1/2-inch cubes – cold pieces of butter turn into steam in the oven and lift the dough into flaky layers.
- 8 to 10 tbsp ice water – just enough to bring the dough together; the exact amount depends on your flour and the humidity.
For the apple filling
- 4 lb (about 1.8 kg) firm baking apples, about 8 large, peeled, cored and sliced 1/2 inch thick – a mix of tart and sweet varieties gives the best flavor (see the guide below).
- 1/2 cup (100 g) granulated sugar and 1/4 cup (50 g) packed light brown sugar – the brown sugar adds a light caramel note.
- 2 tbsp cornstarch – thickens the juices into a clear, glossy filling.
- 1 tsp ground cinnamon and 1/4 tsp ground nutmeg – warm spice without hiding the apples.
- 1/4 tsp salt – sharpens the fruit flavor.
- 1 tbsp fresh lemon juice and 1 tsp finely grated lemon zest – brightness, especially if your apples are on the sweet side.
- 2 tbsp unsalted butter – for cooking the apples.
For the top
- 1 large egg beaten with 1 tbsp milk – the egg wash gives the crust its deep golden shine.
- 1 tbsp coarse or granulated sugar – a light crunch on top.
How to Make It
1. Make the dough – then chill at least 1 hour
Whisk the flour, sugar and salt in a large bowl. Add the cold butter and work it in with a pastry cutter or your fingertips until most of it is the size of peas, with a few larger flattened pieces. Sprinkle in the ice water a tablespoon at a time, tossing with a fork, until the dough holds together when you squeeze a handful. You should still see streaks and flecks of butter in the dough; that is what makes it flaky.
Divide the dough into two pieces, one slightly larger for the bottom crust. Flatten each into a disk, wrap tightly and refrigerate for at least 1 hour, or up to 2 days.
2. Season the apples – 10 minutes
In a large bowl, toss the sliced apples with both sugars, the cornstarch, cinnamon, nutmeg, salt, lemon juice and zest. Let them sit for about 10 minutes. The sugar will start pulling juice out of the apples, and the bottom of the bowl will look wet.
3. Cook the apples gently – about 20 minutes
Melt the butter in a wide heavy skillet or Dutch oven over low heat. Add the apples and all their juices, cover and cook, stirring every few minutes, over the lowest heat that keeps them steaming. If you have a thermometer, keep the apples below 160°F (71°C) for this stage. The slices should soften and turn slightly translucent at the edges but still hold their shape; the liquid should steam, not bubble.
4. Thicken the juices – about 10 minutes
Uncover the pan, raise the heat to medium-high and cook, stirring gently, until the juices bubble and turn thick and glossy. When you drag a spatula across the bottom of the pan, it should leave a trail that closes slowly.
5. Cool the filling completely – about 1 hour
Spread the apples in a single layer on a rimmed baking sheet and let them cool to room temperature. The filling should feel cool to the touch all the way through; warm filling softens the butter in the crust before it reaches the oven.

6. Heat the oven – 425°F (220°C)
Set a rack in the lower third of the oven, put a rimmed baking sheet on it and heat the oven to 425°F (220°C) while the filling cools. The sheet needs the full preheat; a hot surface under the pie plate is what crisps the bottom crust.
7. Line the pie plate
On a lightly floured surface, roll the larger disk into a 12-inch circle about 1/8 inch thick. Ease it into a 9-inch glass pie plate without stretching it and let the extra hang over the rim. If the dough cracks as you roll, let it sit at room temperature for a few minutes; if it turns soft and sticky, chill it for 10 minutes.
8. Fill and top the pie
Pile the cooled filling into the crust and press it down lightly into an even mound. Roll the second disk into an 11- to 12-inch circle and lay it over the top. Trim both crusts to about 1/2 inch past the rim, fold the edge under itself and crimp it with your fingers or a fork. Cut four or five vents in the top. The filling should be packed tightly, with no large air pockets under the top crust.
If the dough feels soft after all the handling, chill the assembled pie for 15 to 20 minutes before baking.
9. Bake – 20 minutes at 425°F, then 30 to 35 minutes at 375°F
Brush the top with the egg wash and sprinkle with sugar. Set the pie on the hot baking sheet and bake for 20 minutes. Lower the heat to 375°F (190°C) and bake for 30 to 35 minutes more. If the edges brown before the center, cover them with strips of foil or a pie shield. The pie is done when the crust is deep golden brown all over and thick juices bubble slowly through the vents. Through the glass plate, the bottom crust should look golden, not pale.
10. Cool – at least 4 hours
Let the pie cool on a rack for at least 4 hours before slicing. The filling keeps setting as it cools; cut it warm and it will run, even with the precooked apples.
Why Precook the Apples?
Raw apples are full of air and water. In a traditional pie, they collapse as they bake, releasing that water and shrinking away from the top crust, which has already set in place. That is where the familiar gap under the dome comes from, along with the soupy bottom that turns the lower crust pale and soft.
Cooking the apples first takes care of both problems before the pie goes into the oven. The slices lose their air and much of their volume in the pan, so you can pack in more fruit, and it will not sink as the pie bakes. Their juices are thickened on the stove, where you can see exactly when they are ready, rather than hoping the cornstarch sets inside a closed crust.
The gentle first stage matters too. Held at a low temperature, below a simmer, apple slices firm up and keep their shape through the rest of the cooking, instead of turning into applesauce. That is why the recipe asks for low heat and patience before the juices are boiled down. If you skip the thermometer, judge by sight: the pan should steam steadily without bubbling.
For a different way to bake with apples that skips the pastry entirely, our French apple cake folds thin slices into a light, custardy batter.
Choosing the Apples
The apples decide whether your filling has distinct, tender slices or a soft, sauce-like texture. Firm varieties hold their shape through precooking and baking; softer ones break down. The University of Illinois Extension lists Granny Smith, Honeycrisp, Golden Delicious, Jonagold, Braeburn and Pink Lady among the varieties suited to pies.
| Apple | Flavor | In a pie |
|---|---|---|
| Granny Smith | Very tart | Stays firm; the classic base for a mix |
| Honeycrisp | Sweet-tart, juicy | Holds its shape well |
| Golden Delicious | Mild, sweet | Softens slightly but keeps its shape |
| Braeburn | Sweet-tart, spicy | Firm, with a strong apple flavor |
| Jonagold | Sweet with some tang | Holds up well; good in a mix |
| Pink Lady | Tart, crisp | Stays firm and bright |
| McIntosh | Tangy, soft | Breaks down; use only a few for a saucier filling |
A mix of about half tart apples, such as Granny Smith, and half sweeter ones, such as Honeycrisp or Golden Delicious, gives a balanced filling with slices that stay whole. Taste one slice before you start: if your apples are very sweet, add the lemon juice in full; if they are very tart, you can add another tablespoon or two of sugar.
If you have a few apples left over, our apple crumb cake is an easy way to use them.
Mistakes to Avoid
- Warm butter in the dough. If the butter melts into the flour while you mix, the crust bakes up tough and mealy instead of flaky. Keep everything cold, and chill the dough again whenever it turns soft.
- Adding warm filling. Hot apples melt the butter in the bottom crust before it reaches the oven. Let the filling cool all the way.
- Stretching the dough into the plate. Stretched pastry shrinks back as it bakes. Lift and ease it into the corners instead.
- Pulling the pie too early. A pale crust has not finished baking, and the cornstarch needs to bubble to thicken fully. Wait for a deep golden color and slow bubbles through the vents.
- Slicing it hot. Even a precooked filling needs a few hours to set. Plan the bake so the pie can cool completely before serving.
The same rules about cold butter and gentle handling apply to any homemade crust, including the one in our classic pumpkin pie.
Make-Ahead and Storing
Ahead of time: the dough keeps in the refrigerator for up to 2 days, and the cooked, cooled filling keeps in a covered container in the refrigerator for up to 2 days. Assemble and bake the pie on the day you want it, or the day before.
Storing: keep the baked pie loosely covered at room temperature for up to 2 days, then move it to the refrigerator. Warm slices in a 350°F (175°C) oven for 10 to 15 minutes to bring back the crisp crust; the microwave softens it.
Freezing: wrap the completely cooled pie tightly in plastic wrap and then foil, and freeze it. Thaw it in the refrigerator overnight, then warm it in a 350°F oven until heated through.
Frequently Asked Questions
Can I skip precooking the apples?
You can, but expect a gap under the top crust and a looser filling. If you use raw apples, slice them thinly, pack them tightly and let the pie cool fully before cutting.
Why use a glass pie plate?
Glass lets you check the bottom crust as it bakes, so you can see when it has turned golden. A metal pie plate also works and browns quickly; a thick ceramic plate may need a few extra minutes.
Can I use store-bought crust?
Yes. Use two refrigerated rolled crusts for a 9-inch plate, and follow the same filling and baking steps.
Can I make a lattice top instead?
Yes. Cut the top crust into strips, weave them over the cooled filling and bake as written. A lattice lets more steam escape, so the top of the filling will look slightly drier.
Looking for something to serve alongside it at a holiday table? Our apple pie pull-apart bread brings the same cinnamon-apple flavors to brunch, and you will find more pies and baked treats among our dessert recipes.
Perfect Apple Pie
Ingredients
Method
- Whisk the flour, sugar and salt. Work in the cold butter until most pieces are pea-sized. Add ice water a tablespoon at a time until the dough holds together when squeezed.
- Divide into two disks, one slightly larger. Wrap and refrigerate at least 1 hour, or up to 2 days.
- Toss the apples with both sugars, cornstarch, cinnamon, nutmeg, salt, lemon juice and zest. Let sit 10 minutes.
- Melt the butter in a wide heavy skillet or Dutch oven over low heat. Add the apples and juices, cover and cook about 20 minutes, stirring every few minutes, keeping them steaming but not bubbling (below 160°F / 71°C if using a thermometer).
- Uncover, raise the heat to medium-high and cook about 10 minutes, stirring gently, until the juices are thick and glossy.
- Spread the filling on a rimmed baking sheet and cool completely, about 1 hour.
- Place a rimmed baking sheet on a rack in the lower third of the oven and heat to 425°F (220°C).
- Roll the larger disk into a 12-inch circle and ease it into a 9-inch glass pie plate. Add the cooled filling and press it into an even mound.
- Roll the second disk into an 11- to 12-inch circle and lay it on top. Trim to 1/2 inch past the rim, fold under, crimp and cut 4 or 5 vents. Chill 15 to 20 minutes if the dough is soft.
- Brush with the egg beaten with milk and sprinkle with sugar. Bake on the hot sheet for 20 minutes, then lower to 375°F (190°C) and bake 30 to 35 minutes more, until deep golden and the juices bubble through the vents. Shield the edges with foil if needed.
- Cool on a rack at least 4 hours before slicing.
Notes

Leave a Reply